
Today I’m so excited to get to introduce you to my friend, Maria, originally from the country of Honduras, who agreed to share with us some of the cooking skills she was taught growing up! These things, while simple, are skills most of us here in the states have never been taught. In trying to feed our families — and especially in arming ourselves with the preparedness skills that can make the most of little resources, these are especially valuable skills to have. I know I’ve learned a lot from her already!
***

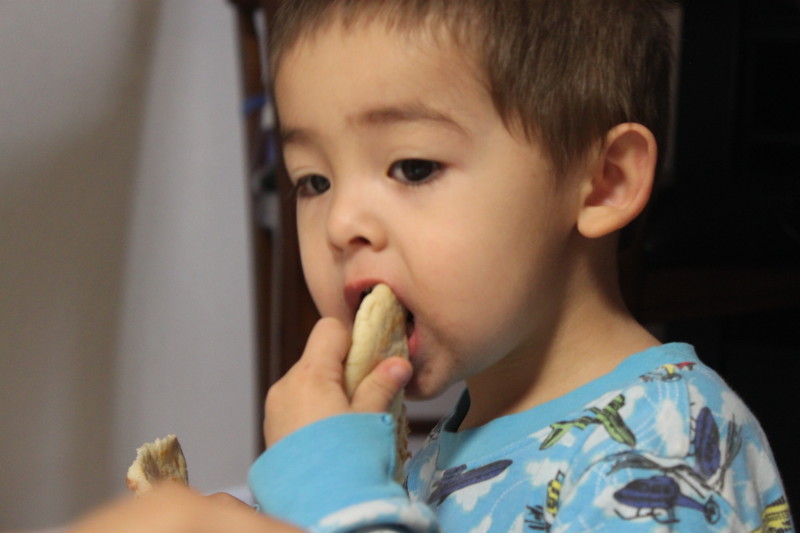
Truly you don’t have to “have” much to cook successfully from the basics, and as demonstrated today even just instant corn flour and water will do. It’s more about knowing how (the techniques) and knowing what (the ingredients that go into it) that will get you by in feeding your family if you ever have to depend on what’s in your storage. In addition to these two things, I’ve realized there’s one other key that’s also essential: a mindset shift. Watching Maria’s two little ones (ages 2 1/2 and 18 months) happily eating empanadas for breakfast is what originally triggered a light bulb to go off in my head, a realization of something Maria has always known but to me was a new way of thinking. Yes, the recipes and the planning are still essential parts of knowing what to store, but as a back up plan, if the craziness of life happens at the worst of times, meals don’t have to be complicated, they can be extremely simple — from the techniques to the bare ingredients– and the kids will still eat!
Learning the skills to cook from scratch like this is common knowledge to many other cultures and taught to them from a very young age, yet we’ve seemed to have missed the importance of it here in our “land of plenty”. Maria and I talked about this, why this appears to be the case, and I don’t think I can say it better than she did so I’m just going to quote her. “It’s because you have everything here and it’s so easy that people don’t learn how to survive”. (And I’ll tell you what, if you were sitting here listening to me preach this sermon in my kitchen this would be the point where I’d call for a group chorus of “Amen”.)
Case in point:
Maria casually remarks to me that if a family went on a 2-3 day long trip in Honduras they’d prepare food ahead of time to bring with them to eat while they travel (btw, these empanadas which she demonstrates today, are what she says they’d commonly pack with them on trips. They’ll stay good for days, she says, and are good to eat either hot or cold). How many families in America get ready for a trip by preparing ahead the food they’ll eat? Not just snacks to eat along the way, but main meals to supply the family while away from home?
Another thing: out of necessity, other cultures are more innovative in utilizing and maximizing the resources they have. Even an empty plastic rice bag has a future use (as you’ll see below) and is re-purposed for good use in the kitchen. Additionally, Maria tells me how she learned to preserve meat using salt when the family had no electricity. I’m sitting there listening to her in awe while simultaneously finding myself just a little bit jealous for all the knowledge she’s acquired at such a young age.
These are skills which to us (who regularly stop by fast food drive throughs and complain when our order is discovered incorrect) are things lost and altogether foreign, but which need to be revisited and taught if we’re ever to gain independence enough to be able to take on survival if needed in a less than cushy world.
So today we’re focusing on a few simplified ideas and two skills/recipes: making corn tortillas and making empanadas filled with cheese and/or beans. Because the skill of making tortillas Maria’s way (by hand instead of using a press) needed more explanation than a few pictures could offer it, I’ve included a series of videos as she makes them for us.
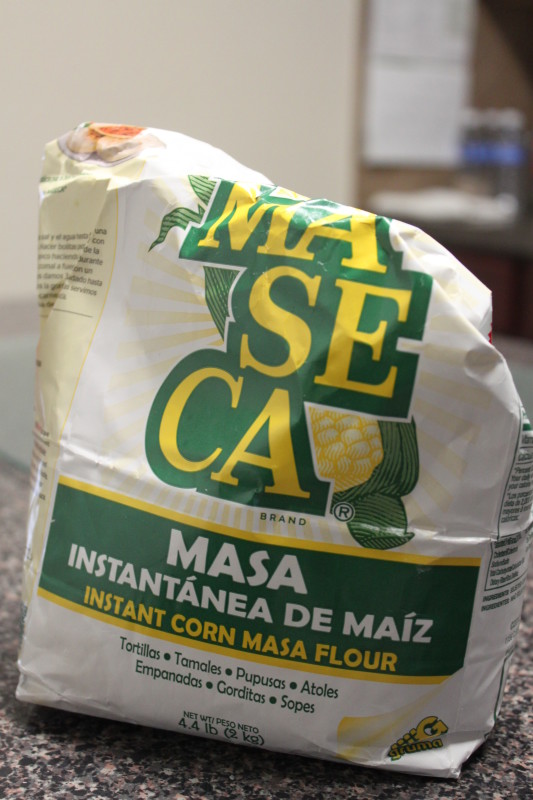
An ingredients list is unnecessary since the main ingredient in both recipes is Maseca (instant corn flour) combined with water. In the case of the empanadas, just a little salt is added, and cheese and/or beans is used as a filling.
Making Corn Tortillas
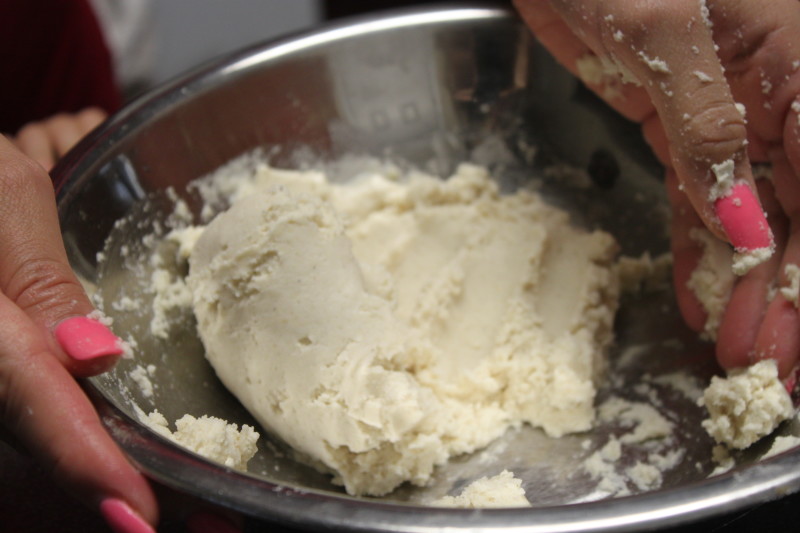
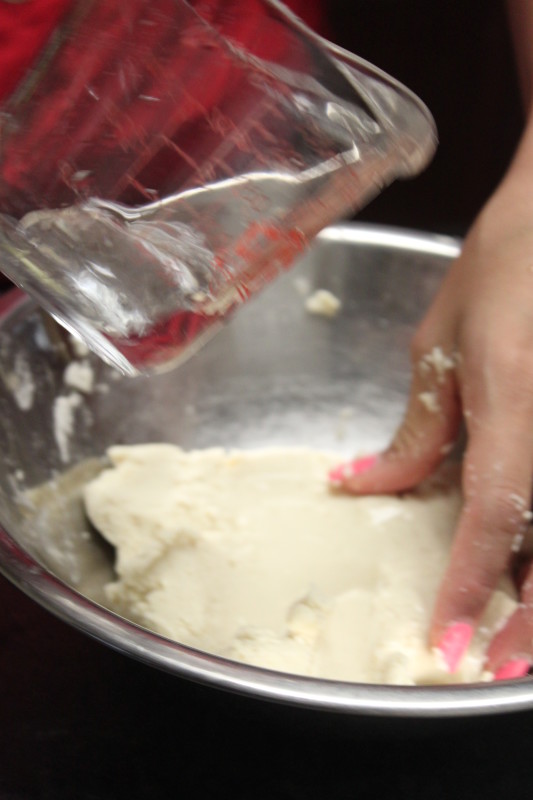
Begin with about a cup of Maseca and slowly add in water as you mix the dough with clean hands. Maria doesn’t measure the amount of water she uses but is able to tell when the dough is right by watching for a few signals in the dough itself.
First, she stresses that it’s important to mix the dough a lot with each addition of water. As the dough is mixed it continues to absorb the water, so if you’re not mixing it enough it won’t be able to absorb the water it needs. If the dough is hard and breaks apart (meaning that if you make a small disc with it and bend it, instead of the dough softly bending it breaks), this indicates it needs more water. (side note: horray! This explains why I’ve had a problem with my corn tortillas breaking when rolled in previous recipes (like this one) .)


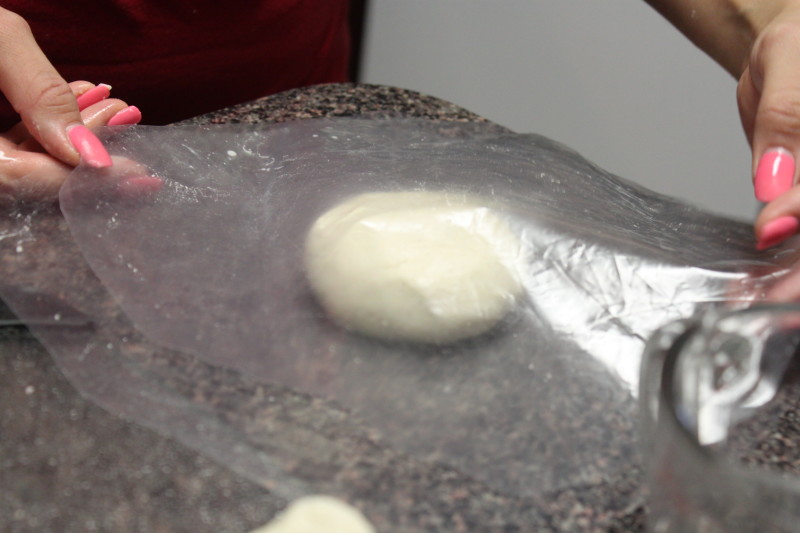
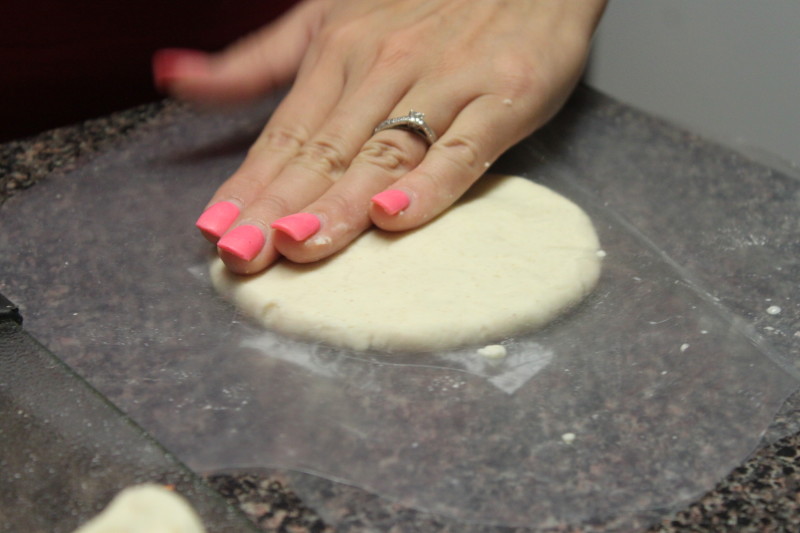
With your dough mixed, you’re ready to form a tortilla. You’ll notice in the picture below a couple of rounds of plastic. These have been cut out of plastic bags (Ziplocs work just fine) and two layers are placed on top of each other to create a sliding surface on which the tortillas are formed. You’ll understand what I mean when you watch the video below.

Also, in preparation, heat your griddle until it’s hot. Maria places her hand about an inch above the griddle and once it feels hot (enough so that it’s uncomfortable) she knows it’s ready. You don’t want it to be too hot or it will burn the tortillas, not too low or it won’t cook them.
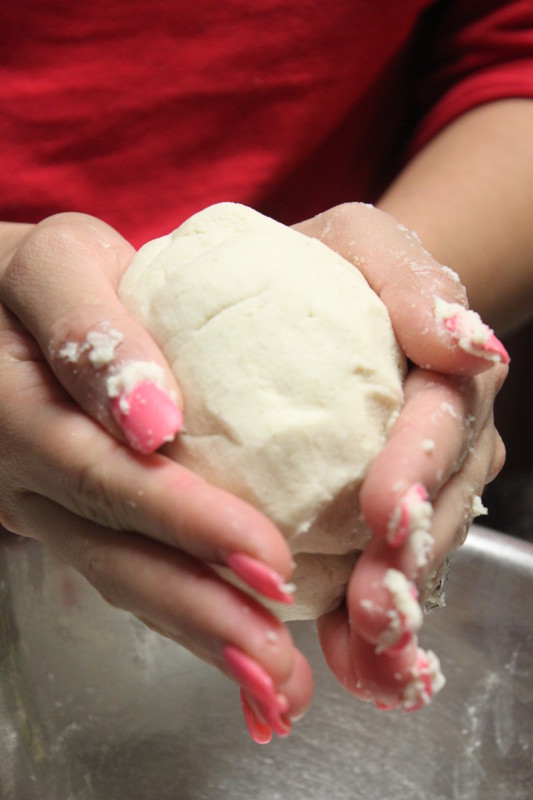
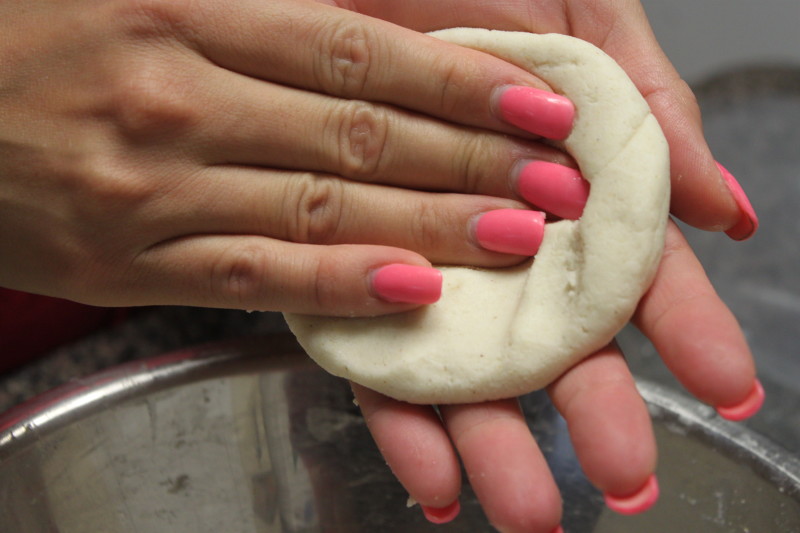
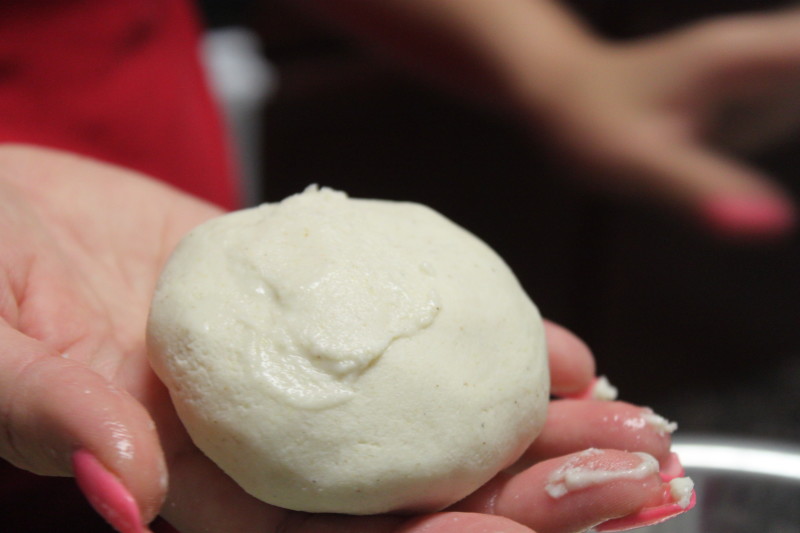
Begin your tortillas by taking about a golf ball sized ball of dough and flattening it into a disc.
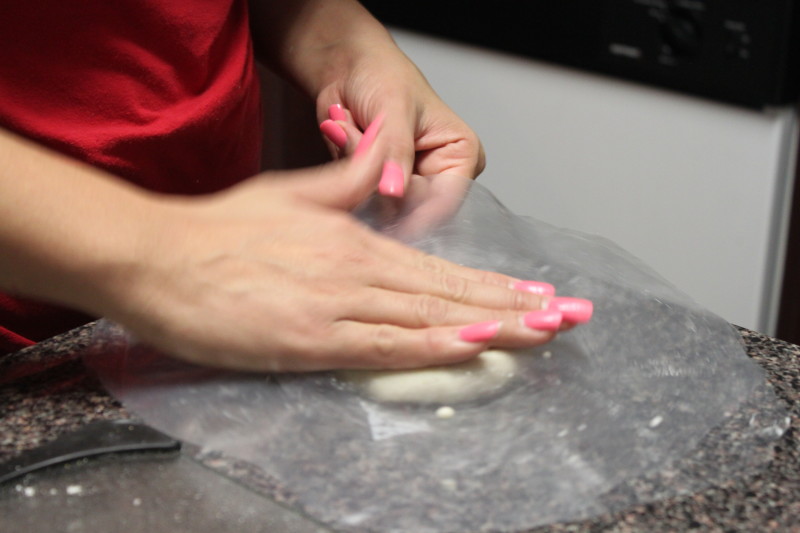
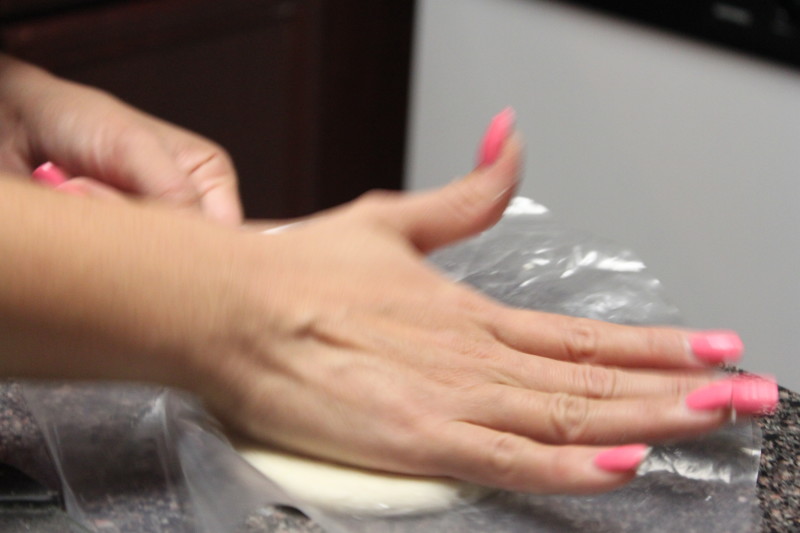
Place this disc onto the two plastic rounds and flatten and shape into a tortilla. Moisten your hands with water if needed so the dough doesn’t stick to your hands. Also, as you’ll see, using the flat area of your palm will help it to be more flat.
After it’s formed, you lay the part of the tortilla that you handled onto the griddle first. This next video shows Maria forming a second tortilla and explaining how to use the palm of your hand. It also shows how she moves it to the pan.
You’re going to cook the tortillas on turning them three times. Allow it to cook on the first side just until the edges yellow.
Cook on the second side until it’s browned and flip again. Finally, with the third side of cooking you’ll see the tortilla puff up. The two sides of it have been cooked and you know it’s done as it begins to puff up.
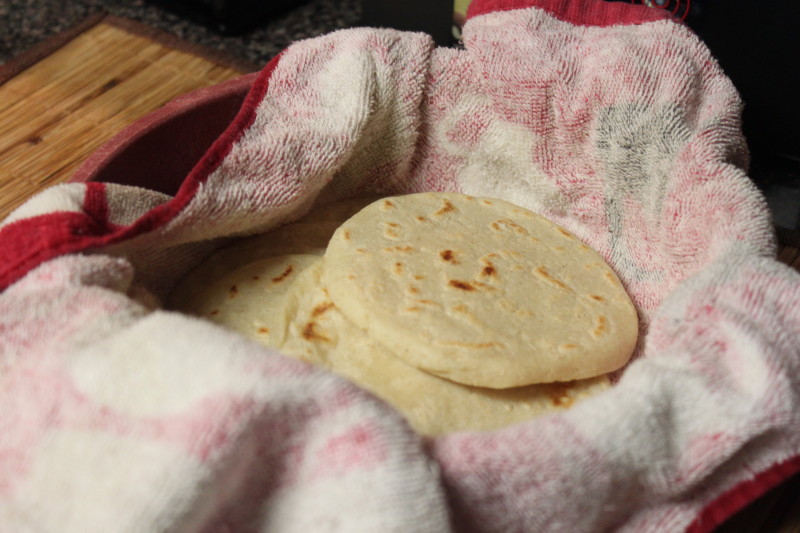
Rest on the cool side of the griddle (only half of it is heated at a time) until you’re ready to move them to a towel lined bowl.
Making Empanadas filled with Cheese and/or Refried Beans
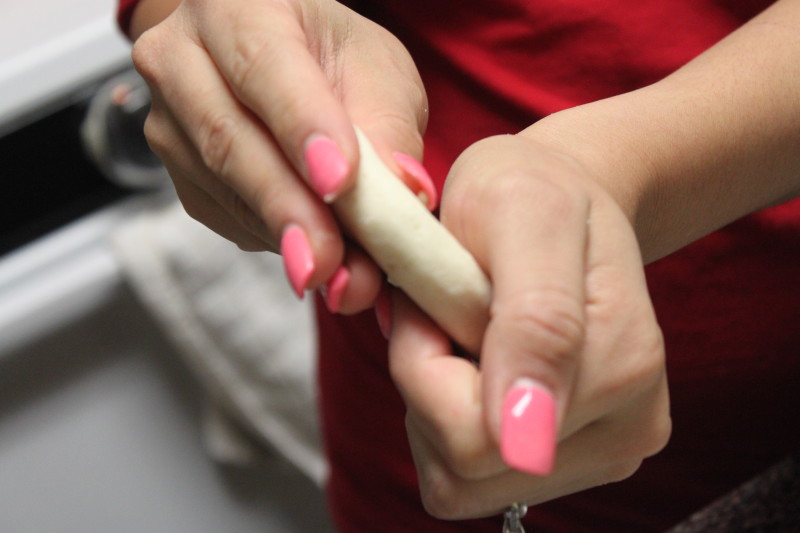
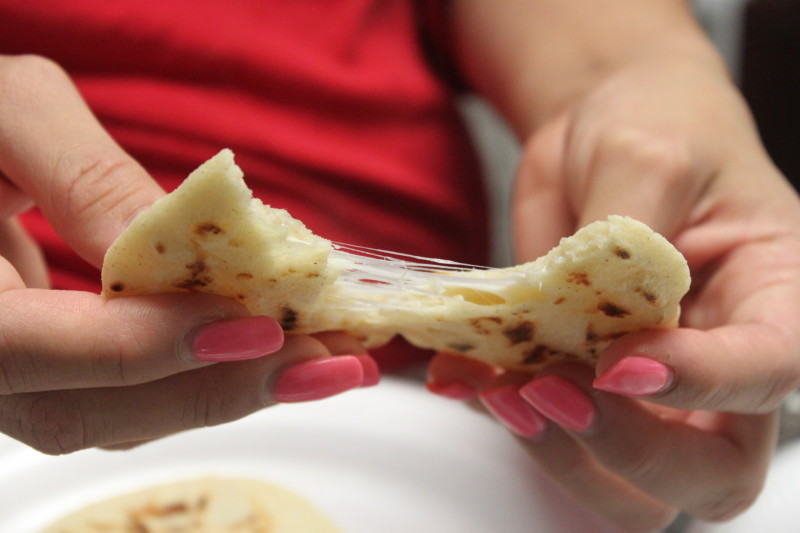
Honduran Empanadas are made exactly in the same way as the corn tortillas, however previous to flattening them they’re filled with cheese or beans (or whatever you’d like) and then cooked over the griddle.
If you’re wanting to plan this for your food storage plan, we’ve many times over demonstrated that freeze dried cheese melts in the same way as normal cheese, so I wouldn’t have any problem using it here just the same in this recipe. Prepare by having the cheese rehydrated 5 minutes ahead of time. (Remember, it rehydrates quickly.)
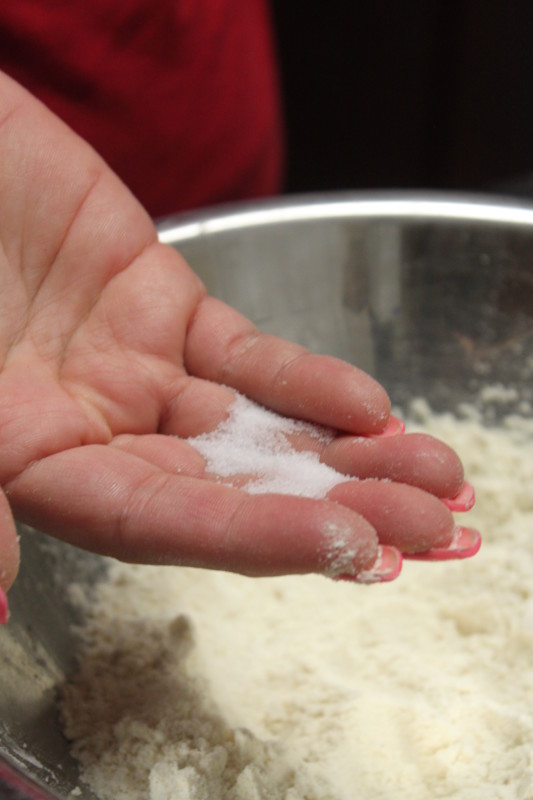
In making the dough, the only difference here is that you’ll want to add a little salt to the Maseca. Again, Maria doesn’t measure it, but this is the amount she uses.
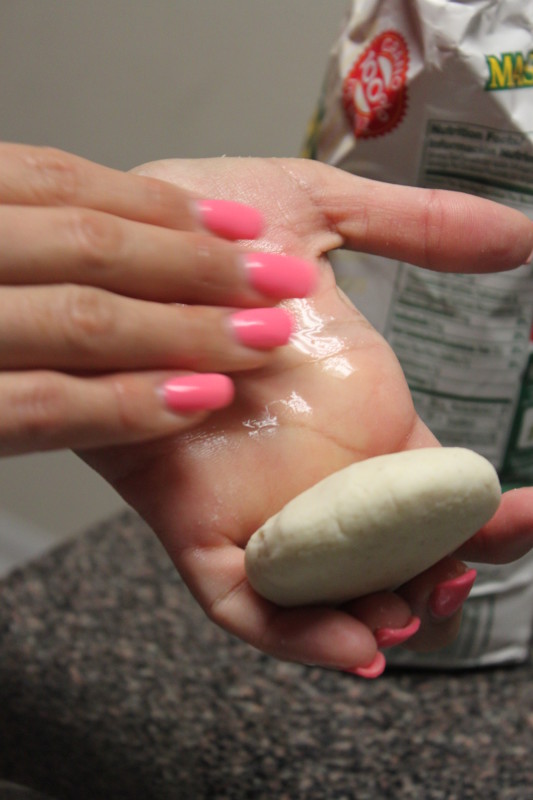
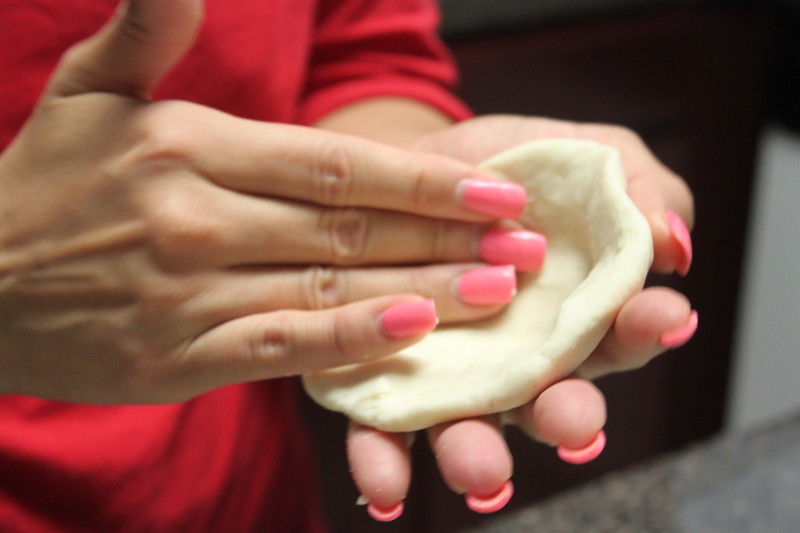
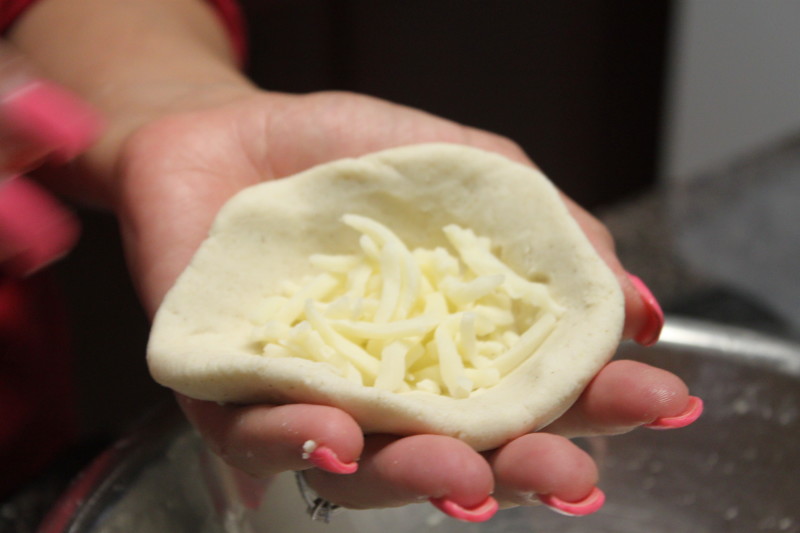
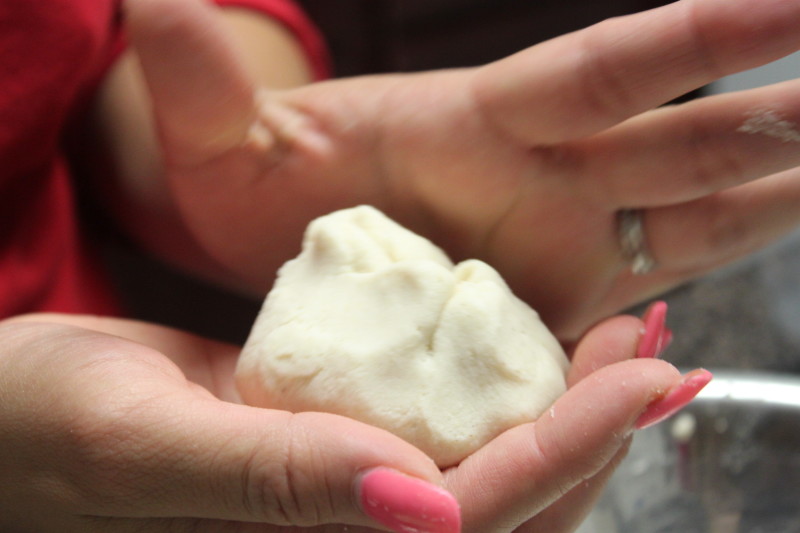
Begin by forming a disc of dough, then wetting your palm (so that the dough doesn’t stick) and creating a cup with the dough to be filled with your choice of filling. If using refried beans, use 1-2 TBS and spread it around followed by cheese.

Bring the dough up and around the filling and close it up as carefully as you can.

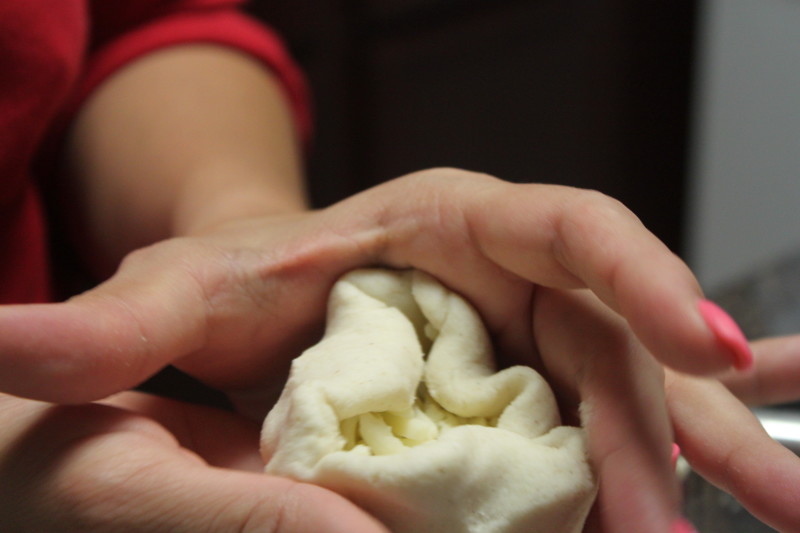
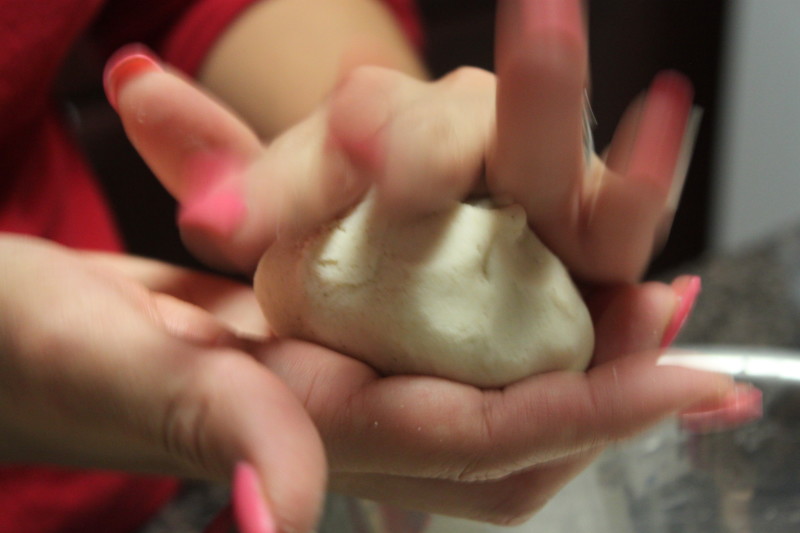

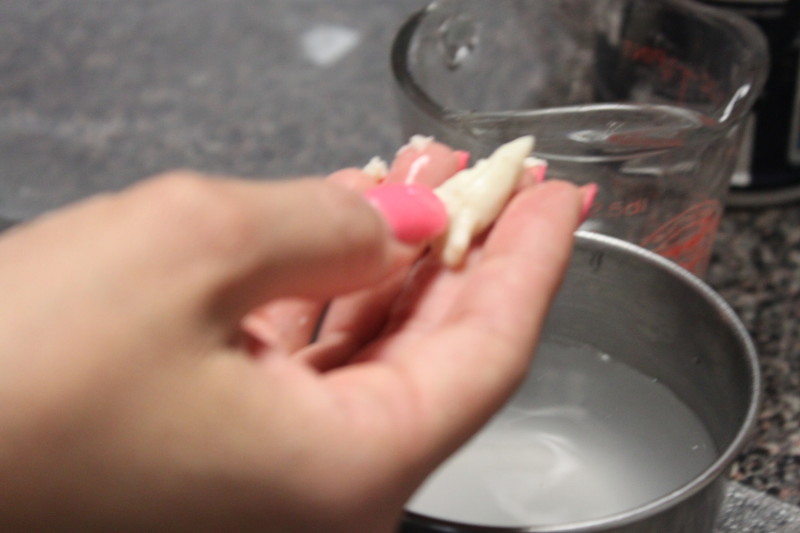
You might have a little hole left near the top that “needs surgery”. For this, use a little dough with some water to cover up the dough. It’s very important to watch for holes in the dough or else you’ll have a mess on your griddle when it comes time to cook.
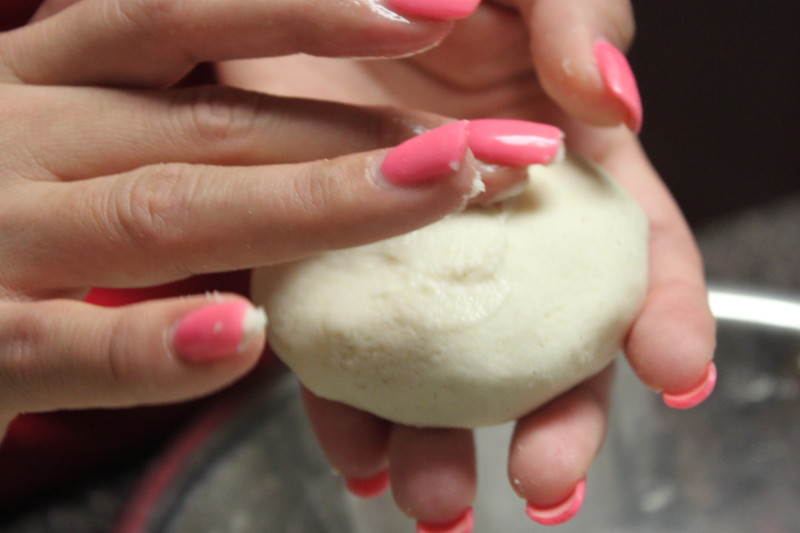
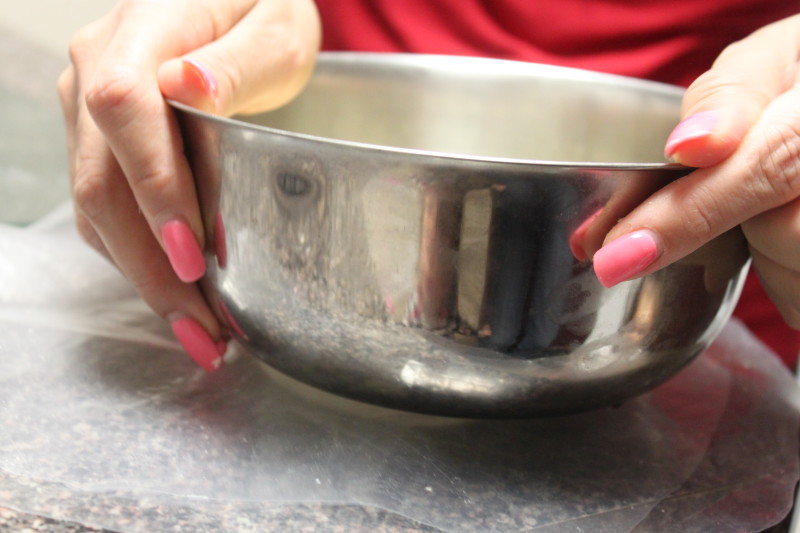
This time, using plastic rounds, you’ll place the empanada between the rounds and press it flat. Maria mentions that the plastic rounds she uses with empanadas is a little thicker than the plastic for the tortillas. She cuts the rounds from the plastic bags that come with the rice she buys (a bit thicker than Ziploc plastic, she says) and believes that it works better.
Begin doing this with your palm and then finally press it with any flat surface (here she uses a bowl).
Cook on the griddle, the very same as with the tortillas (three sides). If you notice any holes as you cook, quickly cover them up with a little dough and spread smooth. Once again you’ll see on the third cooking side the empanada will “puff” up and you’ll know it’s done.

Cool for a minute and then it’s ready to eat! Believe me, never minding their simplicity these are seriously delicious! I can imagine using these for breakfast, lunch or whenever…I think I ate four of them all by myself!
Okay, so I can’t end this post without showing off her absolutely adorable children enjoying their empanadas. Both of these kids are so cute. As she was cooking they were beneath us calling out to each other “tortillas, tortillas!”

~~~~~~~~~~~~~~~~~~~~~~~~~~~~~~
Notes:
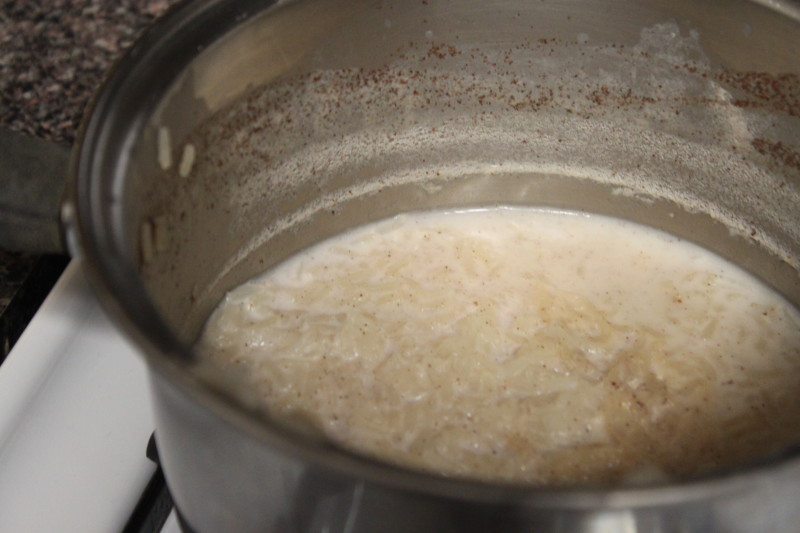
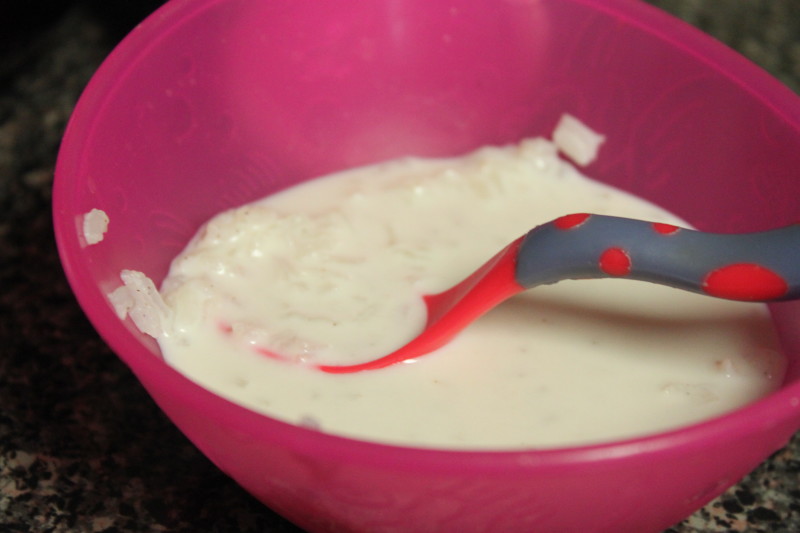
- In addition to never having considered simple empanadas like these for breakfast, another breakfast idea equally as simple that Maria uses a lot is cooked rice with milk. She simply cooks the rice in water, adds a little bit of milk (evaporated milk as a pantry option would also work) and adds a pinch of cinnamon and sugar. Her kids love it!
- Finally, Maria re-uses her plastic rounds always, never throwing them away unless they’re damaged. She simply rinses them and hangs them to dry until next time.


[…] been more than a year!). My sweet friend Maria (who you met over in this post and also this post) translated these recipes for me into Spanish (for any of you who might appreciate Spanish) and I […]
I love how open minded you are. Another great post and recipe. so glad I found your blog!!!
So glad you found it. Thanks for reading!
Does Maria have a cooking blog or Youtube channel? And if not, would she consider doing one? I’d be the first to sign up. Seriously.
Great idea, no she does not (currently) but I’ll ask her about starting one! She’s very willing to share! Who knows, maybe she’d start one.
I just checked out the Food Storage Made Easy website. They talked about grinding corn to make tortillas, yet you mentioned here that the Maseca is an instant corn flour. Is there any difference in using fresh ground corn flour…does one need to prepare it differently than the Maseca? Thanks.
Hi Darlene! Thanks for the question. Maseca (or Masa Harina), is treated with lime and is generally preferred over grinding cornmeal for tortillas. There really isn’t a way to prepare it yourself, without investing in specific tools and being taught how to do it, since there’s a (somewhat) complicated process to it which you’ll see in the article I’ve shared below. As far as what is good for what, cornmeal is said to be best for cornbread and polenta and Masa Harina is preferred for tortillas and tamales. The two corn flour products side by side have a texture difference in addition to a taste difference. Hope that helps! You can read more here: http://www.joepastry.com/2010/what_s_the_difference_between_corn_meal_/
[…] Simple Cooking with Basics: Corn Tortillas & Honduran Empanadas … http://myfoodstoragecookbook.com/Yes, the recipes and the planning are still essential parts of knowing what to store, but as a back up plan, if the craziness of life happens at the worst of times, meals don't have to be complicated, they can be extremely simple … […]
Any idea how long the corn flour lasts in the pantry. I will buy a bag, use it a bit, but not enough to use up before it smells bad. Any luck dry pack canning it to make it last longer?
Oh yes, definitely you can vacuum pack it and it will last much longer. I searched it and it’s shelf life is only 4 months (possibly including the time it’s been on the shelf at the store too?), and if it’s kept in the fridge 6 months. As far as it’s being vacuum packed, I can’t vouch for anything longer than 9 months myself but that’s a lot better than 4. I did just open a jar of it that I’d sealed two years ago (having been pushed to the back of the pantry) and it was very off smelling and had to be thrown out.
Now I’m questioning my food storage. I have corn meal stored in mylar bags w/ O2 absorbers. Wondering if it will be fit to eat. As far as corn products, is it only corn flour that won’t keep?
Really anything that has ground corn in it will have a shorter shelf life, (according to this link I’m sharing, 18 months at the most). You can remedy this for your long term storage by storing whole popcorn kernels and then planning to grind your own cornmeal fresh. Check out this post via “Food Storage Made Easy” for some other details you might want to look at: http://foodstoragemadeeasy.net/2009/10/01/corn-cornmeal/
I am trying these tonight! Thanks!
Thanks for posting this. Haven’t used the corn flour for many years. With these good directions, will now get some. Looking forward to the flour ones.
I completely agree with some amazing skills getting lost. This was a great tutorial. Thank you!
She also makes “baleadas” (flour tortillas Honduras style)
Really good stuff
Oh, she told me about those and promised I could visit when she makes them again. They sound awesome!
Flaviel, do you know if she had a youtube channel or a Honduran cooking blog? I’d like to follow her. I’m engaged to a Honduran man and I want to learn all I can about the food he grew up on.
I’m inspired to try something new! Thanks for a great post!
This is awesome! Pure and simple and so important. Thanks for sharing and thanks Maria!
Megan, Was so excited to get this from you!!! ? I have really missed getting things from you! Thanks, LaRene
Thanks, LaRene, that’s sweet. I decided to take the holiday months off to focus on time with my family. I’ve got a number of things planned for the year though, so you’ll still be hearing from me 😉
I have lived in Mexico and Guatemala so I am very familiar with tortilla making, but I learned some new things here. Thank you!
What great fun!
I’m so glad maria is sharing some of her knowledge with everyone
Oh, tell her thank you, I loved this post it was filled with THE BEST information.
Oh, I will. She’s so willing to teach what she knows, it’s wonderful!